Saturday, March 29, 2014

Butterick 5961 Katherine Tilton Tunic, Done


The day after I bought this pattern, I saw it live at the Sewing Expo's style show.  I went, "Ooooo, cute! I'm gonna make me one myself, soon"


LOVE this fabric. I bought it at the Sewing Expo in Puyallup. At the MarcyTilton.com booth.  It has all my fave colors! Really. All of them. Well, except for brown. But all others are here. Black, grey, pink, purple/eggplant, and lavender!

The day after I bought the fabric, the swatches that I previously ordered from another online shop arrived. One of the swatches was this very fabric! I totally didn't remember that I had seen this before, and I was like, "wow. Ok, then. I must love this."  It's a rayon/Lycra light weight knit. 

After I cut the fabric, I thought -- oh, wait. Maybe I should have chosen a bit thicker knit..... Hmm too late. I even thought about turning it into a fitted long sleeve tee shirt, but the cut fabric pieces were too small for the tee shirt pattern I had. So, I went on to making this tunic anyway. 


Going by the measurements, I cut the size 12, view B. I made the usual petite length adjustment by taking 2" off at the waist, but added it back on the hem thinking I wanted it to be just a little longer than the  original design indented. I ended up taking about 1" off the hem in the end. So, +/- just 1" longer hem for me than the original design.

I also decided that I wanted a long-sleeve tunic rather than 3/4 sleeves.

I think this light weight fabric worked out nicely. I like the way it hangs and drapes.  This pattern  has an interesting sleeve design.  Square armhole. It would be interesting to use contrast fabric for the sleeves. One of the styles (view A) on the pattern envelope is exactly that.

The neck is supposed to be more like a mock turtle which would not have been a good idea for my short neck. So, I decided to give the neckline  a bit more scoop by cutting it further, going with the cutting line of size 8. 


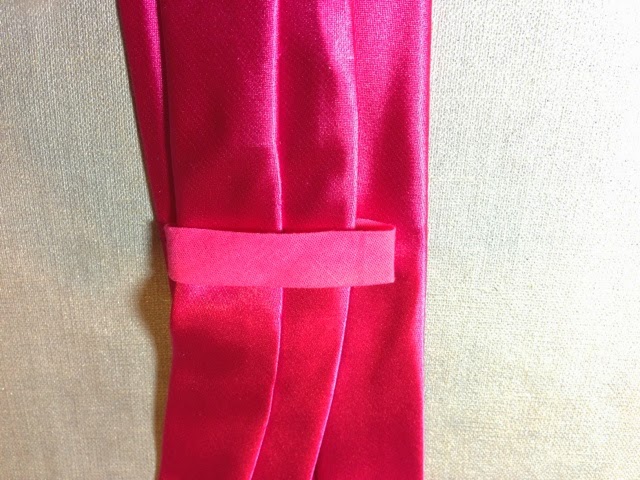
The neckband looked too tall for me so I folded the neckband in half. This also gave the neckband more stability. I did need to measure and cut a longer neckband naturally.

Here is the back view.

I wonder if I should have made it one size smaller.  It's quite roomy, and I like that. But I think I could have done with a size smaller. No??

The bottom of the armhole connects to just about an inch or so above the elbow line.

If I raise my arm, my belly button will go "Heeellow!"
Don't get me wrong.  I love this top. I'm just wondering if I should make it with a smaller size next time. I'd love to make it with fleece or sweater knit next winter.

This was the first project I sewed with a walking foot -- which was a sweet gift from an RTW Fasting sister! Yes, you read it right. I was gifted a Bernina walking foot.

I was having a hard time sewing light weight knit jersey.  I chatted a bit about it on the RTW Fasters group page on facebook.  One of the RTW Fasting sisters pulled out her mother's walking foot that was no longer in use, and offered it to me! That was just about the sweetest thing ever. I love getting sewing supplies passed down to me. I can feel that all these loving hands of women that touched these sewing supplies, blessed each and every tool and as if to encourage me to sew better and with much  joy. Not only her mother had an older Bernina, it was the same model  as mine. Isn't that just the sweetest and amazing? I gratefully accepted the offer, and the RTW Fasting sister promptly mailed it to me. I screamed in joy when it arrived, and it right away met my sewing machine (which, by the way, still remains nameless. The name hasn't come to me...)

Oh, my.  What a difference it makes!  It's magic. The walking foot now is a semi permanent part of my machine, as light weight knit is what I mostly sew right now.  No more frustrations, no more cursing (hahaha..)while seam-ripping, no more super slow stitching, no more stopping often to lift the presser foot to adjust the fabric layers. My sewing stress level went down 500%!  Thank you, Chris!

I can't believe I didn't have a walking foot and I was trying to sew all these flimsy thin jersey knit all this time. Tools! Proper tools are so IMPORTANT!! (You'd think I leaned that by now.)

I'm so proud of this lucky coincidence back of the neckband.  Look at that! You can hardly see there is a stitch line!


This, was intentional. I tried to make sure pattern matching was happening at the sleeves.  Turned out pretty nicely!


To tell you the truth, I had a bit of challenge sewing the sleeves to the square armhole. 

It worked out in the end. 

I'm loving it!

Yes, I think I will make another one perhaps next winter in fleece.
Yes, I already have the fabric for the pants in this pattern to make. Can't wait!


Tuesday, March 18, 2014

Hot Pink Legally Blonde Tie

A satin pink tie! Oooo! 

My son's high school musical cast was doing a preview fundraiser night. They were going to perform a couple of numbers from their upcoming musical, Legally Blonde. The theme color was pink. Hot pink.


 He announced a couple of days before the event that he needed a pink tie. A bright, hot pink, satin pink tie, like these. It's pink, pink, very pink.


I went to a couple of stores. But NO HOT PINK TIE FOUND.  I turned to my RTW Fasters group, initiated by Sarah of Goodbye Valentino.  Help~! Who can recommend me a simple, easy, and fast tie pattern?  Is it hard to make one?  Several responded, giving me some tips and directions. Thank you, my RTW Fasting sisters!

I quickly learned that 1) there are many free tie patterns online; 2) there is a thing called tie interfacing and that this stuff is important; 3) everything is cut in bias = so you need more fabric than you think you do!

I found my pattern at Coletterie. I looked at a few others, just so I have more than one reference point, but I decided this free pattern was good enough. Then, I dashed off to the fabric store.  On my way to the store, suddenly I heard my inner voice say, "Stop at the Value Village, right there on your right.  It's just right there. Check it"  I haven't been to VV in a loooooooooooooong time.  Since I only had one morning to make the tie, it would be ideal if I found an already made tie. So, I decided to spend 5 minutes just to browse through, just in case.  I pulled in to the VV parking lot.

This is what I found, instead of the perfect tie.

A never worn, brightly hot and satiny pink dress. And it's a size something like 16. Lots of fabric. The front had beaded details which had been snagged here and there. So, I didn't feel too bad about taking this new dress apart.

"The blue tag is 50% off today~!" I heard the announcement. Hey, this dress had a blue tag! It was now discounted to $10. So, I bought it.  It's the perfect color, the perfect texture fabric.  No need to go to the fabric store now! Score.

Just the front sash part was enough to make a tie.


With the amount of time I had, and for the first time I made a tie, I'm happy with the result.


I had this French themed fun cotton fabric in my stash I felt was perfect for the lining.  Lucky me, I also found in my stash good enough texture interfacing for the tie. I had just enough!

I didn't know that much handsewing was involved~!!  Any other days, it would have been fine, but I only had very limited time. The fabric was slippery for the machine sewing part, too! 

Luckily, I had a pink bias tape to use for the loop to hold the tie. So many "lucky"s for this tie making. I was meant to make one.

Like so.

Literally, 10 minutes before he had to leave, the tie was done, pressed, ready to go. I spent the next 10 minutes getting dressed to go myself.  What a race. Phew. We made it!

However, what I wasn't quite aware was that;

For this event, the cast was to wear their brand new grey cast sweatshirt OVER anything else they were wearing.

Here he is, with a little look of guilt on his face.  My tie (well, now his) got just three inches of fame!


Just that much of the pink tie peaking out! I could have just GLUE that much of the fabric onto his shirt!

I had him take off the sweatshirt for the photo opp.  Oh, well.  Now I know how to make ties.
Incidentally, happy birthday to my Sweet Son. Ha! That's what I'm going to call him from now on. SS. That's his initials anyway.
And, I have LOTS of satin pink fabric left to make something else. The dress is lined, too. Even more fabric! Ok, that was a lot of fun, race sewing.


Saturday, March 15, 2014

Style Arc Adele Top, Done


This was meant to be a muslin-turned-quite-wearable.  By looking at the drawings on the pattern envelope, I knew the neckline wasn't going to be right for me. 

I have a relatively short neck, and wide lower jawline. I try hard to avoid anything that has a high neckline, turtleneck included, and even regular shirt collar look odd on me, so I hardly ever wear shirts with standing collar. I pulled out Style Arc Susan Top pattern and traced the neckline, but raised up by 1" and incorporate it into the Adele top.   Here is the Susan Top.
 

The Susan top's neckline worked out so well for me, but for the Adele tunic design, I thought the Susan top's scoop neckline was a bit too much.  Also, Adele is a tunic, and for a 5'1" person, the "standard"  length is always an issue.

Anyhow, I picked a not-so-great quality polyester knit fabric from my stash to sacrifice for the muslin. While I was picking the fabric from my stash, I noticed an old tunic that is torn with the very narrow seam allowance therefore unfixable and unwearable, but I kept because I liked the fabric.
That's when I got inspired, and my creative energy just began bubbling up. I decided to forget this was meant to be a muslin, and just decided to have fun with it!

Here is the result.  I'm pretty happy with the neckline, both the neckline height adjustment and the embellishment I added.  Also got carried away and added a faux scarf look.

Many ways to wear.  Like this, first.


Both tails in front.

Or, to the back.

Tie a little bow.

Slightly closer look here.

This is what I did.  Take the original neckband with the main fabric. Cut the embellishment fabric larger than the neckband.  


Stitch the embellishment fabric onto the main fabric, but with a lot more embellishment fabric loosely gathered here and there.  In retrospect, I could have had a lot more loose gather. That would have made the affect more interesting. 

Anyway, the looser and more sloppy it looks, the better and more interesting result it brings. How easy is that?!


Here is the finished neckband with the faux scarf.


I stitched two pieces of " faux scarf" pieces into the neckband.

They lay like this.

I decided to do the same for the sleeves.

The actual color of the main fabric is a lot darker. It's teal.


By the way, a little sewing tip, trick, whatever you may want to call it.  This is helpful, I think, if you are not sure if your cutting line is completely straight and therefore can't count on the consistent seam allowance width would give you the correct stitch line.  Perhaps you had to adjust the stitch line for sizing so that you can no longer count on the seam allowance width as a stitch guide. Or, if you are like me, you'd rather mark the stitch line so that you know that is the exact line you need to sew.  And, especially if you are working with slippery fabric without an aid of walking foot or anything fancy like that.

Baste the stitch line first so that the pieces are together and there is a less chance of fabrics slipping. (or so that you could try on the garment before you do the final stitching).

When you are ready to give it a final, real stitch, pin outside the stitch line on the seam allowance so that the fabrics won't slip. 

Undo the first couple of inches of basting stitch.  (You could stitch over the basing stitch, but it will be harder to undo the basting stitch.) 

Mark the stitching line where there is no longer basting stitch.

Sew.

When you catch up to the basting stitch, repeat the process. 


I first saw the above on facebook.  I traced the source, and found that you could order a t-shirt with this art! At redbubble.  Isn't that cute!?


Well, it was meant to be a muslin, but quite wearable and I kind of like it.


I shortened the length by 1.5".  Or was that 2"??


Due to the fabric (100% polyester - not my favorite) it clings on a bit.  The armhole was a bit too tight as you can see.  I'll make it wider next time I make this top.  I'd like to make it with a comfortable fabric.  I will definitely keep the lower neckline, and I may add a colorful neckband like this again.

Are you sewing? I'm a bit frustrated lately that I don't find enough time to sew.  Patience, I tell myself. I try to do something to make a progress in my sewing project even if I only have 15 minutes.  All the fabrics I bought at the Sewing Expo are staring at me as I stare at them.  Patience.